When I first heard of vermiculuture, I seriously thought this was called "worm culture". Turns out, I wasn't too far off. Vermis is latin for worm and thus, vermiculture is the raising and production of earthworms for the purpose of both the worms themselves and their byproducts.

Why compost with worms?
Black Gold; Worm Tea. Okay, I'd better explain because a friend of mine who's a chef thought I was seriously going to drink the worm tea!
The black gold I'm referring to is a combination of worm castings and decomposed garbage that is rich in nutrients and micro-organisms; wonderful for adding to your existing soil as an amendment to help your plants grow strong, healthy, and nutrient rich.
The worm tea is the liquid that drains off. Again, it's rich in nutrients and can be used to water your plants.
And of course, the worms, if they're happy, are making lots of baby worms and before long, you may have so many worms that you might want to share some with a friend!
Personally, I like the fact that my children and I can watch nature up close and participate in the cycle of life that God has established in order to care for each of us and all of His creation. His works never cease to amaze me!
If you're an urban homesteader, particularly in an apartment, worm composting is perfect for creating your own potting fertilizer! Imagine a balcony or patio of healthy, lush produce!
Can you use any worms?
Not all worms are suited for composting. Earth worms do better directly in the soil, but red worms and European night worms are suited well for this container type composting. I was able to get my worms from a friend who had been composting about 2 years (thanks Maureen!). You can purchase them if necessary, but they're not cheap! Just think of this as an investment in your fertilizer for the year!
How does it work?
The worms help accelerate the breaking down of garbage by tunneling through the material. This allows more air to circulate and prevents you from needing to turn the compost so often. In addition, as they consume some of the kitchen waste, they add their own waste to the mix (castings). Just like chicken or cow manure, it's good fertilizer.
Making Your Own Worm Composter
You'll need:
2 large plastic bins about 18 gallons in size
1 lid to fit one of the bins
2 bricks or blocks
1 discarded screen or screening material you've purchased
a drill with a large bit
duct tape
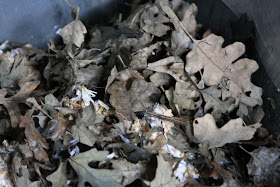
compost bedding such as shredded newspapers, leaves, coir, saw dust, etc.
composting material such as kitchen scraps and coffee grounds
red worms
* This project cost me less than $10 because I used a reclaimed screen and got my worms from a friend!
Instructions:
Drill holes along the top of one of the bins to create air flow for the worms.


Add the two bricks to the bottom of the other container so that the container with holes is sitting inside this container and is elevated (see photo above).

Drill more holes in the bottom of the same container that you originally drilled holes for air. The holes on the bottom are for drainage. The liquid from the compost will pass through these holes into the container with the bricks.

Cut the screening material out of the old screen or measure enough to cover the bottom and sides of the container with holes.

Start taping the sides with the duct tape and then eventually tape the corners so that it is flush with the container. The screening material will allow the liquid to pass through, but not the worms or the composted material.


Wet the shredded paper. We used a wash tub with water but I don't recommend this method. Use a spray bottle with water instead. Also, there is some discussion on proper paper - newspaper with black ink only is best, but we went with what we had - recycled copy paper.


Place the newspaper in the bin.

Begin layering with other materials.

Add some coffee grounds.


Add kitchen scraps and more coffee grounds (worms love the stuff).

Turn and mix a bit. This should be damp, but not soaking.

Now you can add your red worms!

Happy at home already!

Be sure to add your lid (sunlight can hurt these little creatures) and place your bin out of direct sunlight so that you don't cook your worms! They enjoy a moderate temperature - they are cold blooded, so they will be the temperature of your room. I have mine in the laundry room for now, but when summer arrives, they might be living in the garage!

I've barely scratched the surface on this topic, so if you'd like to learn more about worm composting, Red Worm Composting is a great site with lots and lots of information to get you going successfully. And they sell red worms, too.
Don't forget to check your "tea" in the bottom container and remove it regularly so that it doesn't fill up too full. Just lift the other container out, set it somewhere (like in the grass!) and dump the tea where it can work for you. In a few months, you'll be able to harvest some of the castings. But be sure to get as many worms out as possible before you do. Perhaps I'll learn the trick to doing that easily and I'll report on it later!
And finally, as you add more kitchen waste, be sure to add more bedding and wet it with the spray bottle, keeping your bins at least half full. I'll talk in more detail about adding material in another post.
Anyone else interested in vermiculture?


