.

Showing posts with label Gardening. Show all posts

Wednesday, January 12, 2011

The Best Seed Starting Chart Ever!

Have you figured out when to start your tomato plants indoors? How about the correct date for sowing lettuce outside? Onion sets. Do you know when you can plant them? Is figuring all this out like a huge guessing game and lots of calendar flipping?


Photo Credit: -tiko-


I just about danced a jig around the house when Leslie Boss from Tranquil Acres of Alexandria passed along this Gardener's Seed Starting Chart from You Grow Girl! Unlike most seed starting charts, this one is a free Excel program that allows you to enter your last frost date so that it calculates all the information for you! 


I doubt I really need to go into details because once you click the link and download the Chart, you'll see all you want to know about it, but allow me to praise it's merits just a bit...

• Custom feature allows you to enter your own last frost date
• Twenty five vegetables and three herbs are charted
• Direct sow and seed starting dates are included
• An early and late option is listed for each
• The growth period is given so you know about how long until harvest
• There is a separate column for dates to set out plants
• A planting date is included for items you started by seed (both early and late options)

The only thing this doesn't do is give me a date to sow a second harvest. Okay... I guess I can work a little and figure that one out. It should be pretty obvious from all the information given on the chart. Can you tell that I just want someone to tell me "do it on this date"?

I believe a big thanks is in order to Gayla Trail and Maggie Wang who developed this chart. Give them a big shout out and leave a comment here!


Monday, January 3, 2011

Planning Your 2011 Garden

Snow covers the ground, the days are short, the wind is cold, and seed catalogs are arriving in the mailbox. Time to plan your 2011 garden! A hot cup a tea, a warm fire, and notes from last year's successes and failures... perfect for dreaming and shopping for just the right tomato varieties! But before you finish your order form, keep in mind some of these planning ideas...

Photo Credit: cafemama

2011 Gardening Goals and Considerations

• It's hard to know in January what food prices will be like in August. Or what food items will be available. Take this weekend for example: A big snowstorm is expected and I ran in the grocery store to pick up a couple of items before heading home, only to find the entire section of chicken wiped out. I mean, picked clean! Nothing. Zero. Apparently the truck couldn't get through with a delivery. Who knows what the food scenario will be like 8 or 9 months from now. So I want to grow enough that I can meet my family's needs throughout the growing season. 

• Whether you garden organically or with conventional sprays and pesticides, you'll need to include enough plants for some "loss" due to gophers, deer, rabbits, other pests, and of course, some disease. A thunderstorm or hail could wipe out a crop as well, so plan on some succession planting instead of planting everything at the same time. Succesion planting is also helpful so that you don't have to eat the entire crop all at once. The exception might be an item you're canning in bulk and would need the entire crop in one harvest.

Photo Credit: run dorkas run

• Although I would much rather eat fresh foods as opposed to canned or dehydrated, I'll definitely include some plant seeds for food storage of some kind. Especially tomatoes since their lycopene increases when canned. And having a selection of pickled items is always a bonus. Planning ahead keeps costs down, otherwise you'll end up paying the farmer at the market for those pickling cucumbers!

• Typically when I plan my garden, I only buy enough for my family and a little to give away. This year, I want to specifically grow produce for three additional people: a widow in our church who lives near by and an elderly couple who don't grow vegetables anymore. I'll still grow a bit for giving away, but I will specifically order seeds and grow plants for these three people. Perhaps in time (perhaps a couple of years down the road), I'll grow enough food for all my neighbors as well since none of them currently garden and if there was ever a crisis, they'd need to eat. But for now, I want to aim my limited resources to those who can't garden themselves and could benefit from the produce, especially since they are all on limited incomes.

• I really don't need a bunch of extra sweets at Christmas, and so I'm grateful when I receive something that is considered REAL food. This year, I got a lovely box of items from a friend that included some awesome pickled veggies. Such a treat during the holidays! So as I'm planning, I want to think ahead to next Christmas and plan what I might want to make and give away so that I can actually grow it myself. 

• Keep in mind not only your particular gardening zone, but your microclimate as well. Keeping records of varieties that work well in your area will make ordering a breeze the next year. You'll also want to consider the difference between types of seed: heirloom, hybrids, GMOs, organic v. non-organic, etc.

Photo Credit: Jackal of all trades

• Do you want a few flowers as well? Why not make your vegetable garden a potager and include some annuals and cutting flowers, or perhaps some flowering herbs! You'll find you want to be out in your garden more and more as it develops into a place of beauty, so don't forget the flower seeds!

• Add some herb seeds and you're food will be well seasoned all year. Herbs are easy to grow and easy to dehydrate. You'll save yourself the purchase price of store bought and they'll taste even fresher! 

• Last year I grew armloads of basil. Talk about prolific! I had enough to stock my freezer in pesto for the year. A friend who is a retired chef and now sells food to restaurants told me that the local chefs paid him $7 for a bunch of basil. Over at Thy Hand Hath Provided, her brother grew sunflowers to sell on an honor system. This year I plan to help my youngest start a small business growing cut flowers to sell. So don't forget to pick some seeds for food to sell!

So now you have some things to consider while picking out your seeds. Don't be surprised if your bill stretches over $100, $150, or even $200 depending on your goals! But if it saves you $400 in groceries every month for most of the year, then the pay off is worth it. I usually set aside some grocery money to cover my seed costs because, after all, it's food, right?

If you find that you've ordered too many seeds, trade with friends or just vacuum seal the remainder and place them in your freezer. Small mylar bags work will great for this. However, if you plan on using the seeds throughout the season for succesion plantings, place them in a ziplock back in the back of your refrigerator and use as needed.

Now, off to start narrowing down my selections!

What other considerations should one include in seed selection?


Monday, December 6, 2010

Simple Christmas: Forcing Narcissus Bulbs

In keeping with my simple and natural Christmas theme this year, I started a florist shop. No... just kidding. But I did start a whole bunch of Paperwhite Narcissus bulbs in various containers to spread throughout the house.  Even if you start some right away, they probably won't bloom in time for Christmas unless they are well on their way to sprouting (they typically need 4-6 weeks to bloom), but you could have them ready for the after Christmas blahs of January. Wouldn't that be lovely?


Once these are taller, I'll add moss around them to fill in the space. 
I'm thinking these will go nicely on the coffee table or kitchen island.

This collection will go on the table behind the sofa that 
divides our living room from our dining and kitchen area.

The sunroom? I'm still trying to decide.

All the bulbs just getting started. The red and blue containers will go in 
each of the girls rooms so our out-of-town guests can enjoy a bit 
of holiday cheer. The rusty tin container... perhaps in the guest bathroom.

How To Force Narcissus

• Select a water tight container, potting soil or pebbles, bulbs, and water. (Tall containers help support the stems and leaves.)

• Fill container about 3/4 with moist (but not wet) potting soil or about 1/3 of pebbles (unless using a really tall container). 

• Place bulbs directly on surface, pointed end up. For potting soil, cover the bulbs, but leave 1/3 - 1/4 of the bulb exposed. For pebbles, no additional stones are needed.

• Keep soil moist. For pebbles, keep the water level just at the bottom of the bulb. You do not want the bulb to be sitting in water or it will rot (you do want the roots in the water.)

• Place in a dark, cool location until roots are about 2 inches long (50 degrees is good). 

• When roots are established, move your container to a bright, warm location. You may need to rotate your container regularly as the foliage will stretch toward the light. If there isn't enough light, your bulbs will get leggy and flop over,and they may anyway. Be prepared to support the stems and leaves if necessary. A pretty ribbon tied around the foliage and a support will look lovely.

Perhaps when they're in bloom I'll post some more photos. I'm hoping I timed these just right. Seems a bit tricky to me, but I'm know that even if they're blooming before or after Christmas, rather than right on the 25th, they'll be a joy to behold!

Are you using any plants in your Christmas decorating this year?

Wednesday, September 22, 2010

Season Extenders: Making Garden Tunnels

Perhaps you're like me and looking at options to extend your existing garden a bit longer into the fall or early winter. You can make tunnels with PVC pipe, but if you're needing something a bit sturdier, there's a product that you might consider from Johnny's Select Seeds...


Problem #1: This simple little gadget isn't cheap. At roughly $70, it might be a good investment if you can get a bunch of gardening friends to go in on it together. However, you'll still need to purchase the actual conduit to bend, row covers, and clips, so keep that in mind when deciding how much you want to spend. 

Here's another video that might help make the investment a bit more appealing since it allows you to "raise the roof" so to speak...


Problem #2: Now it's starting to get my attention a bit more. However, here on the mountain, I have to consider snow. This really isn't going to take more than a light dusting of that lovely white powder. But if you live where rain is more of an issue, this might be a great inexpensive solution.

On the flip side, it has my mind thinking of ways to modify it further and add extra support. I've been looking at a lot of posts written by other bloggers who deal with snow and most suggest a support down the middle of some kind. David LeFerney has a detailed post on his hoop house at The Door Garden. You must read this second post (here) to find out how he solved a collapse issue when snow accumulated on it.

I'll keep you posted if I get to this project this fall. It's on the to-do list, but there's no guarantee it will materialize this season. In the meantime, I'd love to hear any suggestions you have for making a similar structure that will withstand at least 6 inches of snow!


Monday, August 2, 2010

The Complete Compost Gardening Guide

See that book over on the left? That's my latest find that I consider a real treasure. I've been so excited, I could hardly wait to tell you all about it. I found The Complete Compost Gardening Guide by Barbara Pleasant and Deborah L. Martin, at a book store up in Napa and had to purchase it on the spot.


I use the library a lot, but when it comes to classics or resources that I'll use over and over, I usually go ahead and make the purchase. And in this case, I really think you will want to do the same. 


First, I thought the price was more than fair for what you get. At 8 1/2" x 11" and over 300 pages of information, it was a reasonable purchase. You can get it through the Homestead Revival™ Amazon Store (see my {Books} tab), and it's less than $14 and with combined super saver shipping, you can have it arrive without paying a postal fee. 


Second, I love the fact that it has some really fabulous information on nice, glossy pages with beautiful photographs. It's well laid out so that you can read it in brief sittings and it's easy on the eyes, drawing you into the dirt on composting. I just adore a book that is both pretty and chock full of good info!


Third, the two gals who wrote the book really covered it all. And while they went beyond just the basics of composting, they made it easy to read and understand. Barbara and Deborah even covered different ways to compost including vermicompost (using earthworms as primary decomposers), something I've thought about, but felt was a huge project that I'd have to research and tackle when I could get caught up on some other stuff. 


Table of Contents:
1. Gardening in Garbage
2. Tools for the Composter's Garden 
3. Materials for the Composter's Garden
4. Banner Batches (That's a really good batch of compost!)
5. Comforter Compost and Grow Heaps
6. Composting Underground in Craters, Trenches, and Holes
7. Catch-and-Release Vermicompost
8. Making the Most of Your Compost


There's also a section on plants that grow well right in a compost pile! If I listed all the sub-topics my post would be way too long, so we'll just highlight a few things that I thought were interesting:


• five foundation tools for your composter's garden
• tools for cutting and chopping
• composting ailing plants and weeds
• compost activators
• curing finished compost
• getting started with grow heaps
• managing moisture
• the compost problem solver
• secrets of the subsoil
• the hows and whys of compost screening
• getting rid of unwanted seeds
• making special soils
• and of course the entire chapter on vermicomposting!


Did I say that the book was pretty? Oh, yes. I guess I did. Who would have thought that you could have a nice book on composting? You can definitely tell a woman had a hand in that. I like the fact that this book is actually written with women in mind! And that's important since turning compost and moving dirt around can be a real strain on a gal.


I've looked at a lot of compost books and websites. This is the best I've seen. Seriously. Get the book.


Thursday, June 24, 2010

Potager Gardens

Potager Garden Definition: (pronunciation: puh ta zhay) a garden that combines both edible and ornamental plants; a vegetable garden that is utilitarian in nature but designed with beauty in mind; much like an English kitchen garden, but often formal and symmetrically designed in the French fashion. 

I love the idea of a potager garden. I don't know that I would want one to be so formal, but beautifully designed? Most certainly! I prefer to mix formal and informal elements together. Something perhaps... like this:


Photo Credit: Lisa Hubbard


While there is structure to this garden, it definitely has rustic elements, such as the fence and edging material. Also, the plants are neatly contained, but not in such a structured way that you feel you must be in your best dress to walk through it! And see the flowers casually mixed in?


Most of you are already vegetable gardeners, but have you considered adding marigolds alongside the tomatoes, zinnias next to the cucumbers, or sunflowers behind the green beans? How about roses along the outside of the fence?


While you may feel that your garden space is limited or producing enough vegetables for your family and a few neighbors is a priority, don't overlook the value that flowers alongside your veggies can add to your life...


• Some flowers are edible and can grace both your garden and your dishes. Pansies, nasturtiums, and lavender are all great to include in a potager garden. Here's a list of more edible flowers.


• Flowers can be visually soothing to the soul and soothing to the body as well since many are medicinal in nature. For a list of 15 medicinal flowers, read here.


• Flowers with high nectar concentrations can help attract bees to vegetables that are in need of pollination. They can also encourage beneficial insects to stick around your veggies while other flowers repel the bad bugs


• There are several combinations of flowers and vegetables that actually help each other. Who wouldn't want to give their vegetables a beautiful boost?


• A potager garden can be a colorful source of cut flowers from spring through fall, and in some areas, even winter. Flower cuttings in vases bring an element of the outdoors inside, but they also provide something for you to take to friends when visiting. What a blessing to be able to arrive at a friends house with a small bouquet of daisies or an armful of lilac branches!


Photo Credit: left-hand


Ideas For Adding Flowers To Your Vegetable Garden


• Consider adding a fence to define your garden space. It will not only deter animals (to a degree), but it will give you a backdrop to add plants. On the outside, add larger flower options such as roses, peonies, lilacs, and climbing vines. On the inside, grow tall flowers along the fence, such as sunflowers, and smaller vegetables in front of them.


• Use smaller flowering plants as borders and edges around your beds. Marigolds, pansies, and chives.


• Don't forget to add flowering herbs! Mixing these in around the garden can add fragrance, texture, and flavor to your vegetable dishes.


• You may wish to add a central bed to the garden, specifically for visual interest with flowers being part of the focus. An obelisk with a climbing vine surrounded by an array of flowers would make any gardener want to visit the veggies often!


• Consider mixing neat and formal plants with the casual and informal; for example, a row of flowers that are shaped in a compact mound alongside a lacy and slightly wild veggie, such as beans.


• Try growing a climbing vegetable alongside a climbing flowering vine. Let the two intermingle to create a beautifully unique look.


Photo Credit: Ilja


* If you've planted extra vegetables of a certain variety, allow some of them go to seed and flower out to enjoy their own unique beauty.


• If you really prefer things neat and tidy, you can always plant beds of flowers and vegetables separately, but next to each other, alternating between the two.


Photo Credit: UGArdener


A lovely garden doesn't happen over night. It often takes years of dreaming, planning, and hard work. By adding the element of flowers you can make the process a joy!


How have you incorporated flowers into your vegetable garden and what tips can you share?


Tuesday, May 18, 2010

Organizing Seeds and Planting Records

Has anyone besides me been frustrated with storing seed packets in an organized manner? Here is what I had been using...


The problem with this is that all the seed packages are just thrown in there without any rhyme or reason. I have to read the back of each package and sort through lots of info to figure out what to plant when. I find I'm constantly rechecking books, planting schedules, and charts trying to figure out what to do. And since I haven't been keeping a garden journal, I have had nothing to reference for my particular area. 

It's definitely confusing at times. Especially when I read that other bloggers are planting tomatoes outside in April and it's still freezing every night on the mountain. It can make one too anxious and therefore jump the gun when it comes to setting out plants.

I finally had my eureka moment and realized that I'm not organized in this area. I've been "flying by the seat of my pants" so to speak. Time to fix that!

Inspired by Mrs. Chiot at Chiot's Run (that's my name for her - hope you like it Mrs. Chiot!), I decided on a similar method of utilizing mini file folders and a box (see her post here). But I still needed more info at my fingertips. Something I could quickly browse through, glance at for the needed information, and actually understand what I needed to do and when.

So I sat down and brainstormed all the information that would be helpful in knowing when to plant something. I considered:

• good companions
• bad companions
• how to start each variety
• optimal seed sprouting temps
• when I wanted to start the seeds (or directly sow)
• when I actually got around to it!
• how many of each variety to grow
• if I wanted to plant a second fall crop
• how long the seeds would last before needing to be replaced

The results?


My form came together after some adjusting here and there and I was able to add it to my blog as a pdf download should you be interested in using it for your personal use. (For future reference, you will find this as a tab at the top, just under my header, where it says Free Downloads). I didn't have room for info on crop rotation, and I knew that I'd need something later that I forgot, so I added a second section for notes.

The form is made to cut out and paste on the front of a mini file folder, just big enough for a seed packet. This is where Mrs. Chiot's idea helped me a lot. I couldn't get the file folders locally, and didn't want to wait, so I purchased some colored card stock and made my own using this free template from Vale Design. They were very easy to cut out and not too time consuming, so I was very pleased with the results. 


I chose four different colors - one for each season of the year since I want to aim for year-round gardening. The colors will hopefully remind me at a glance seeds that need to be started or what seeds needs to be directly sown in spring, summer, fall, and winter. 

Next, I taped the ends so that the file folder was actually a pocket for the seed packet.


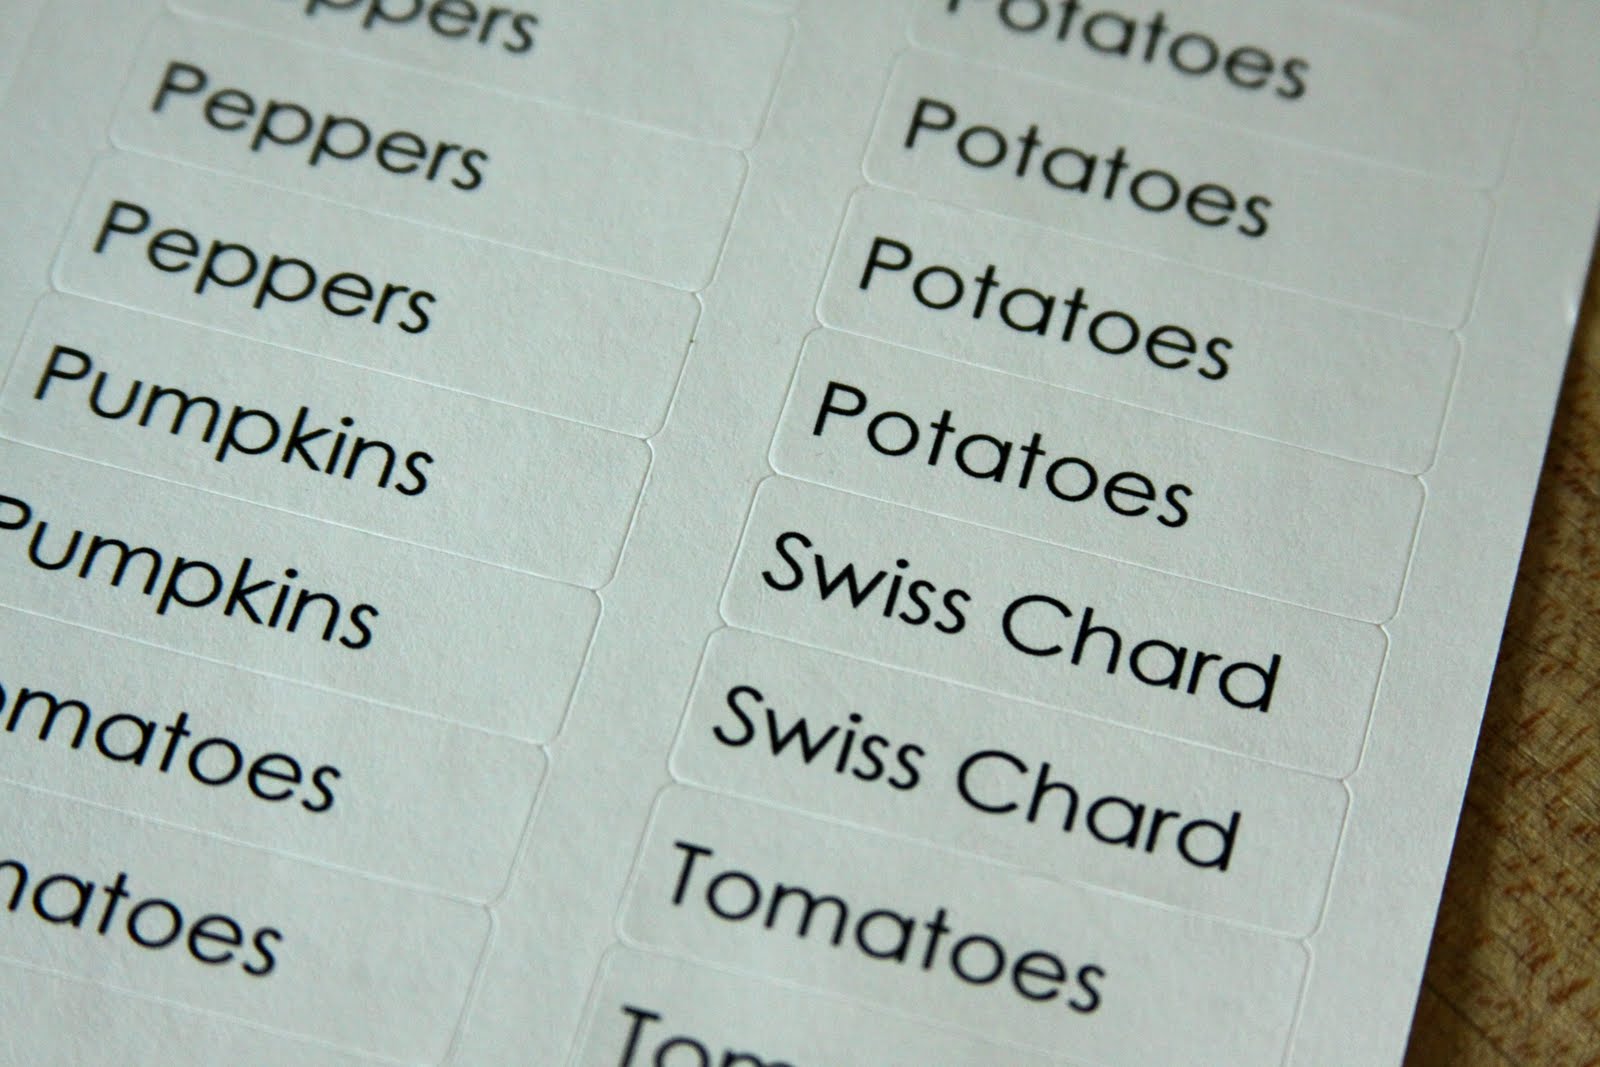
I made a sheet of small labels...


and added it to the file folder pocket and glued the form on the front.


Everything fit inside nicely.


Just place them all in an appropriately sized container and you're organized!


I wrote everything on the front in pencil because I may find that I need to make changes, especially regarding planting dates and the number of plants I grow of each. Hopefully this  method will help me stay on top of when to plant and act as a garden record as well. Wouldn't that be nice?


Monday, March 22, 2010

Starting Seeds Indoors

A huge number of you (166) voted in last weeks poll which asked if you would be planting a vegetable garden this year. Overwhelmingly, 71 will be increasing the size, while an additional 45 will at least be keeping it the same. I was thrilled to see so many that were going to give it a try for the first time!

If you're just starting out, keep your expectations reasonable and jump in there and try some easy to grow items such as radishes, sugar snap peas, zucchini, and of course, the beloved tomato. It will give you confidence while getting your feet wet (or shall we say, your fingernails a bit dirty?). And hopefully, you can get some great tips from other bloggers, either here or on their own blogs.


Because of our ground squirrel problem (and moles, etc.), in the past I've stuck to gardening in raised beds with chicken wire on the bottom. I'll still be using these, but this year, I am going to increase the size, planting right in the ground. With the economy and our house for sale, I don't want to spend more money on raised beds right now, but I feel the need to increase the amount of food we grow. I'm hoping that the cats have now gotten the pests under control somewhat. They killed a lot of the little critters last year!


My growing season on the mountain is a little shorter than most areas, so starting seeds early indoors is really helpful. Recently, I spent a bit of cash to purchase some grow lights to start seedlings indoor because last year I went crazy running them around from window to window. Since the shelving and lights are portable, if we move I will still have my investment for the next homestead. 


My husband opted for these metal shelves because they could be reused for many things during the year out in the garage (hope I get them back next season!). A simple dowel will allow us to raise the lights as needed when the plants get taller. These could certainly be constructed out of scrap wood, too! 


Here's what I'll be doing today as I homeschool... making paper pots for planting.


You don't need a little wood pot maker. You can use a can or any other cylinder shaped item in your home and Thy Hand Hath Provided has an excellent tutorial on how to make these. I just love the fact that you can recycle paper to make them and that they compost right in your garden. I've tried the peat pots, but it seems they are almost too thick and the pots hinder my roots a bit. Perhaps they work better for others, but the newspaper pots are my favorite so far.


If you've never heard of soil blockers, you might want to watch this short video over at You Tube to see how to make blocks out of soil without any container. You must make an initial investment in the soil block maker, but it's a really practical option for those growing a lot of seeds, like for a small farm.


Jill M. Nicolaus has posted a series of 5 articles on Seed Starting 101 over at the Dave's Garden website. If you're new to seed starting,  you've had trouble in the past, or if you just need a refresher, I recommend reading through these before you begin. Her information is really good!


So, I better get to making pots. Don't forget this week's poll. And I'd love to hear your favorite seed starting tip!


Saturday, February 27, 2010

Seeds! They're Arriving!

I don't know which makes me more excited. Getting the seed catalogs in January or the seeds themselves in February! If you haven't done so, you need to order ASAP because seed sales are anything but sagging and last year, seed companies sold out of some varieties early.  As we all know, they just can't whip up a few more whenever they want!


This year I received seeds from three sources: Seeds of Change, Seed Savers Exchange, and Hometown Seeds.


I love their bright yellow packaging that is water proof - if you have them sealed! I find these are handy when out in the garden as the package really holds up.


On the back, they have covered just about every imaginable bit of information you might need while out planting. No need to keep going back to a gardening book to look up info.


Can I have two favorites? Honestly, I think I split my ordering needs between these two companies this year. I was so impressed with Seed Savers Exchange mission to preserve seeds, especially heirloom varieties.

Love these photos...


And my favorite part? The directions for saving the seeds are right on the back!


This was a new company that contacted me about survival seeds. If you don't have some of these in your freezer, you should. It's kind of like having a savings account, only in seeds instead of dollars. Now I'm not a doomsdayer, but there is such a thing as being wise - whether in regards to economy or catastrophy. Having some stored seeds allows you to have a back up for getting a garden started in the event that you can't get ahold of seeds at some point, whatever the reason. And all these are non-hybrid and will produce true to variety. 


As you can see, these came packaged in mylar, ready to go into my freezer. I love that! These should store for about 10 years in the freezer or 5 years on the shelf (if in a cool place).


I just have to share one thing I'm very excited about. I am going to grow my first beans for drying. I've wanted to do this ever since I went to Maine in 2003. We had stopped at a farm that had a stand with maple syrup, fresh apple cider, and produce. But they also had several varieties of dried beans grown right there on the farm. Not your ordinary varieties, but unusual ones, much like these two that I picked...


Actually, I picked two more, but they aren't all in yet. I will have to limit myself because I have only so much space, but I had to try!

So, now I just have to be patient to plant. That's really hard. I'd much rather have spring weather right away and get started! At least I can start some of them indoors and feed my gardening desire! I just need to plan when.

Please share something new you are doing in your garden this year and inspire us!


Friday, February 26, 2010

Easy Garden Composting

If you read my recent post on The Kitchen Composter or Composting Around the House, you're may be thinking, "Okay, that's easy stuff to do, but that outdoors thing... well, that's too difficult for me." 


What if I told you it was just as easy?


Photo Credit: Joi


There are books upon books written on the subject if you're looking to brew some hummus in hurry, for a large farm, or commercially, but if you're looking to make compost on a small scale at home, it's pretty much a no fail garden project. And don't we all like a garden venture that is actually going to work! Seriously, by God's design, organic matter breaks down. It's just a matter of how long can you wait.


Mother Earth News has just published an article in their recent publication "Guide to Organic Gardening" which includes an article "Compost Made Easy". Of all the things I've read on composting, this one truly made it seem like a piece a cake (or better yet, a good mud pie!).


You can also watch Master Gardener Ed Bruske, a D.C. gardener who was a former journalist for the Washington Post on a series of on-line videos he's put together at MonkeySee. Each of the 15 videos is about 2-4 minutes long.


One last resource you may find helpful, Lars at CompostingInstructions.com has put together an entire website just devoted to making this black gold for your garden. You can find pictures and all sorts of information there.


Easy Compost Basics:


• Compost is made up of green (wet) materials and brown (dry) materials. 


• Green would be things like grass clippings, manure, and stuff from your kitchen compost.


• Brown would be dry leaves, pine needles, dead plants (not diseased), and newspaper.


• Aim for a mix of 1/3 green and 2/3 brown materials, but 1/2 and 1/2 will still compost just fine. Like making a soup, this doesn't have to be perfect to come out great.


• All organic or living things WILL break down, eventually. To accelerate the breaking down into hummus you need 1) air flow; 2) moisture with drainage; 3) optimal temperature; 4) and a balance of green and brown materials.
Photo Credit: wisemandarine
• Use a composter that allows air to move through the pile. (More on this on another post).


• If you're pile seems dry and dusty, turn and add water.


• Too wet, turn and add dry material.


• A healthy pile will feel warm to the touch, except maybe in winter. If it is too cool, add more green high-nitrogen material, such as manure, and turn.


• Place your compost pile strategically - near your garden where you'll use it; under a deciduous tree if possible (shade in summer so it doesn't over cook and sun in winter to keep it going as much as possible); and near a water faucet so you can add water when needed.


• A hot compost pile may break down quicker, but won't necessarily be richer in microbial diversity.    

• Like fine wine, a compost pile that is allowed to mature over a longer period of time will be richer in these micro-organisms. 


• Any size compost pile will work, but keeping it about 3 feet tall will allow it to start heating up and still be a size you can work with.


• Turn it when you can (although not necessary). No need to be legalistic about how often, however you may need to turn more often if it gets too wet.


• Smell your pile to determine it's health. You want it to smell earthy, but not stink. 


• If it stinks, it could be 1) too wet - add more dry material; 2) kitchen scraps too close to the top - turn and work them down below the surface; 3) no smell at all? In early fall you may find you need to add water if you have a lot of brown material which you just added.


• Some leaves tend to be "leathery" like California Oak leaves and should be run through a shredder before putting into a composter. Otherwise, it could take longer than necessary to break down.


Want to share an additional tip?


LinkWithin

Related Posts with Thumbnails