.

Monday, January 31, 2011

Winner of Levi's Lye Soap Give-Away

Thank you to everyone who supported Levi's Lye Soap this last week by entering the give-away, especially those who made purchases through Amanda's Etsy Store and those who blogged, facebooked, or tweeted about the give-away. 


Our winner is...


Congratulations! This soap looks fabulous and I'm so glad you're going to get a chance to try it. Please remember Amanda's soaps when you are looking for beautiful hand made products, whether for yourself or as a gift. And for those hoping to make your own soap... stick around. I'm about to embark on a new homesteading adventure into soap making as well. I've been gathering supplies, planning, reading, and learning. I can only hope mine look half as wonderful as Levi's Lye Soaps!


Gotta Have Gardening Geer

Since we're all curled up in front of the fireplace, sipping tea, and blogging about our "gardens-to-be" this spring, now is the perfect time to think about your gardening wardrobe. 


Uhhhh... wardrobe? (But what you're really thinking to yourself is... "Missy, Gardening isn't suppose to be a fashion show!")


I'm talking about attire that helps you do the job and do it well. Things like gloves, boots, and sun hats. These three items can really make a difference when you spend time regularly in the garden doing manual labor. 


Photo Credit: roswellsgirl


For several years I refused to invest in quality gloves, gardening boots, or a hat of any kind. I'd like to think that age has made me wiser, but in truth, I know age has made me... well,... older. 


Yep, my body isn't quite as able to rough as much as it use to. More and more I find that a good soak in the bath is necessary after a full day in the garden. So when I finally broke down and purchased some good gardening geer, it was like new life was breathed into my body!


If I had to list these items in priority, I would recommend gloves as your first purchase. Perhaps you think I'm really a wimp, but jobs I'd never tackle with my bare hands are no problem with gloves. They kind of give me that feeling of Super Woman where I can do whatever it takes; no job is too hard, heavy, dirty, rough, thorny, bug infested,... well, almost. 


Thankfully, you really don't have to spend a fortune on good gardening gloves, but you can't buy them at the dollar store either. I won't attempt to recommend a particular glove because I feel like this is a personal preference and depending on the job, you may want a different type of glove. So do a little shopping around see what's out there. 


Photo Credit: Jaymi Heimbuch


If possible, be sure to try the gloves on. For some reason my fingers must be longer than normal because the average medium just won't work for me; I have to go up to a large almost all the time. Get a glove that fits well and won't interfere with your work, but will enhance it. Each spring, Costco usually sells a package with several types so you have a glove for every kind of job. Do I use them all? Not really, but I find a pair or two in the package that works best for me and then I share the others with the kids. (They're not nearly as picky! Oh, yeah, that's because they're younger and they think they don't need gloves. But wait until they get into something with thorns and it's another story!)


Moving on to boots... this is the item that surprised me most. When I finally broke down and paid the outrageous price the catalog was asking for a pair of quality gardening boots, I thought I'd lost my mind! But these old feet just couldn't take the worn out tennis shoes and clogs I'd been using. Tell me if you don't do the same thing... 


You buy a pair of nice tennis shoes and wear them for a couple of years, all the while taking really good care of them because you paid so much! Then one day, you get involved in a project that's a little bit messier than you anticipated and they get a tad dirtier than you had hoped. You clean them up a bit and carry on, until the next project, where you wear them again and get them a bit dirtier than the last time. Perhaps you clean them a little, but not nearly as well as the first time. So continues the circle of projects and mess until the shoes are looking past their prime. And in the meantime, the arch support has broken down and you really need a new pair for exercise.


Upon buying the new pair of tennis shoes, the old pair gets set aside in the closet, mudroom, or garage until gardening day, when you pull them out and think "I'll wear these out in the garden so I don't ruin my new tennis shoes", where upon you find that after several hours outside your feet hurt because the worn out supports don't support, and little rocks and dirt are all in your socks because the sides are so low, all causing more discomfort. But, you continue to wear these because you're so wise and frugal, until the new tennis shoes wear out and you switch them out for another worn down pair.


Does that scenario sound familiar at all? Hello... am I the only one doing this? 


Not any more I'm not. I said "hooey" on that bit of nonsense. And I invested in a pair of good quality gardening boots. 


Photo Credit: Bogsfootwear.com


And ohhhhh, the joy of it all!! My feet felt fabulous! Why did I wait so long? And just what exactly was I thinking that I didn't need good shoes when doing the most strenuous work of my week?


Okay, I am going to recommend a boot here, but I realize there are others out there...


I love Bogs


There. I said it. They didn't pay me to do this post, nor do they know I'm even writing this. I just want to spread the joy! 


Easy on, easy off, good support (highest priority), tall enough to keep dirt out, waterproof, breathes in summer, decent enough for quick winter chores, and looks great. Did I forget anything? After a full year, these boots still feel great and are holding up to the work I'm doing in my garden and in the chicken coop. Why did I wait so long? (Oh, yeah, I said that, didn't I.)


Photo Credit: Sloggers


Finally hats. Now you can be sure that with this item I'm not making a fashion statement because I don't look so hot in a hat. But I don't want to wear a ton of sunscreen either (and I forget to reapply). So a hat is essential to protect my skin from too much exposure. 


A baseball cap looks cute, but it isn't going to give you the coverage you really need. Find a wide brim hat that breathes so you stay cool while covering your face so as to allow you to stay out in the sun longer (and protect your skin!). 


Come on, friends! Don't be so frugal as to end your gardening days before your prime! Invest in quality items, take care of them, and they'll take care of you! You can be sure the farmer who grew those veggies at the store has these items because he knows they're necessary to do the job. And if you're doing his job at your own home, why shouldn't you have the equipment you need?


What's on your list for must have gardening geer? Please sure to share your favorites!


Sunday, January 30, 2011

Sunday Blessing

"Trust in the LORD with all your heart
And do not lean on your own understanding."
~ Proverbs 3:5 

Photo Credit: Luke Robinson

Words... easy to say; harder to live.

"For now we see in a mirror dimly, 
but then face to face; 
now I know in part, 
but then I will know fully 
just as I also have been fully known.
But now faith, hope, love, 
abide these three; 
but the greatest of these is love."
~ I Corinthians 13: 12-13

Keep on trusting and loving. And then lean into Him, dear one, with all your being... and know Him


Saturday, January 29, 2011

Potager 101!

Good news! Angela at Parisienne Farmgirl is starting a Potager 101 Series in February - just in time to chase all the winter blues away! 


Hmmm... what is a potager, you say? 


Why, my favorite type of kitchen garden, of couse! Combining both edible and ornamental plants, a potager is utilitarian in nature (influenced by the kitchen beds of England), but designed with beauty in mind (inspired by the lovely compositions of French gardens). For some pretty pictures, check out my post, Potager Gardens.


For seasoned garderners and newbees alike, she'll cover recommended reading, garden design, seed selection, starting seeds, transplanting, pest control, and more! So if you're longing for healthier food but beauty is what inspires you, now is the time to get your game on and visit Angela so you don't miss a thing!

I'm so there!

Friday, January 28, 2011

Raw Milk For Chickens?

For those who can not obtain raw milk in your area, I apologize in advance for this post. I'm sure it seems such a waste to feed raw milk to chickens when your children can't even get it. Truly, I'm very sorry and my heart goes out to you!


None-the-less, I've found that my "girls" like clabbered milk, often called buttermilk. Such a treat for them... they go WILD! Rich in Vitamin B, calcium, and probiotics, I believe it's good for them, too.


Interestingly, according to the American Poultry Advocate, Volume 23, written in 1914, "Sour milk, buttermilk, skimmed milk all have a tendency to keep poultry well and in the doing this prevents much growth of worms". Now you might not put much stock in that, but apparently, it certainly wasn't seen as harmful to chickens. Keep in mind, back in 1914, most farmers had their own raw milk source, so don't confuse this with pasteurized and homogenized milk. In order to have probiotics in the milk, it would need to be raw. 


So, do you give your chickens raw milk? I'd love to hear your thoughts!


Wednesday, January 26, 2011

Laundry Room Organization

I can not believe I'm saying this, but I actually enjoy doing laundry. This hasn't always been the case. In fact, it was one of my least favorite chores growing up and well into my married life. Some of it probably had to do with the fact that we had to use a laundry mat for years. Not much fun and honestly, I don't have any words of wisdom on that subject except save like crazy and go buy yourself a washer or figure out how to do it by hand! I was so desperate at one rental house we lived in that we got a hand-me-down washer from my husband's parents and put it on the back porch and hooked it up. Seriously. It worked just fine until the pipes froze one winter. 

Photo Credit: darrylh

Back to laundry at home... I'm assuming you have a washer and perhaps a dryer or clothes line. And a space to do your laundry, whether it's a garage, a basement, or a dedicated space often referred to as a laundry room. Let's face it, you're going to spend some time here, and depending on the size of your family; quite a bit of time. Why, oh, why, do we leave this space to fall into disarray and chaos, filled with clutter and junk from other rooms in the house? Why don't we make this space a joy to be in and efficient for the task of cleaning our clothes?

Years ago, I realized that I had to get this space under control. And not just cleaned up, but beautiful. Someplace I wanted to be! It didn't matter that the space was small and a dual use room, I had to make it so that I would be drawn to do my laundry productively on a regular basis. Here's some tips that helped me accomplish this goal...

Laundry Room Organization Tips

• Clean out the clutter. Unless you do not have any other space such as a garage, barn, storage shed, basement, or attic space where you can store discarded items, clean out everything that doesn't have to do specifically with laundry from your laundry area. If your washer and dryer share the space with your pantry or mud room (or another use), designate a portion for just laundry and clear it out. Be ruthless and ask yourself if you really need this item to do laundry.

• Keep the laundry room for laundry. Do not allow other things to take over your laundry space. If you must keep a tool box or other items in this space, make sure that they are organized and won't interfere with actually doing the laundry. You may need to get creative on this, but don't give up - and speaking of up, think UP. Consider using the wall space above for storage. Add some kind of shelves or a recycled cabinet if you need more space.

Create a space for folding clothes. If you don't have a place right by your washer and dryer, clothes will have to be taken to another area to fold. Avoid this at all costs! If you don't, chances are laundry will pile up beyond your ability to keep up with it (guaranteed - unless there are only one or two of you in your family!). However, if your folding area is right near your dryer, you'll be motivated to fold it while it's nice and warm, straight from the dryer. (If you use a clothesline, fold it as you take it down!)


I have a front load washer and dryer, but I opted not to use the pedestal drawers that were sold separately, but often encouraged. While I must bend over to access the appliances (good for the waistline), it allowed me to put an inexpensive Formica counter over the top since the controls are below on the face of the appliance. If you don't have this option, consider a countertop in another part of the room, but nearby, or install a folding shelf that drops down over the appliance when needed. This could be as simple as a prefabricated shelf on hinges with a latch to keep it up and a chain on each end for when it's lowered. As a last resort, you could use the top of the dryer, but you must keep it cleaned off at all times! So, I think you get the idea. Get some kind of folding space!

Have some way to hang clothes. Not everything is folded, so have a hook nearby. I'm getting ready to install more of these so that I have several!


If you have limited space you might opt for a retractable valet bar


Years ago in another home, I installed a regular closet rod over the washer and dryer. This worked great for us! Or how about a rod over the door


Keep in mind that like folding, you will want to hang as soon as possible after the heat has gone off so that clothes won't wrinkle and you'll be more motivated. Let's face it, warm clothes are just a pleasure to fold and hang; cold clothes are not.

Set up an area for line dry items. While you can hang dry some things on your coat hangers, a lot of items will loose their shape or get hanger marks if you hang them up. Laying the item flat is a better option. Your counter space might be your only choice, but if you have space for a drying rack, either a table top, wall mount, or stand up model, invest in one at the earliest opportunity. (This is on my list!)


Choose a beautiful and practical way to display detergents, stain removers, clothespins, and other items used daily. I love these jars! (But you knew that already.) I use them everywhere. And who says you can't use them in the garage on the shelf? Make your laundry corner pretty, girls! Put a cute mat in front, hang a pretty shower curtain around it to section it off, or put one on either side. Paint the plywood a bright color if you have to. Your garage laundry area will be spiffy in no time! 


These three jars cost me less than $30 with tax and I bought them one at a time. 


I found this tiny tin cup at an antique store for $3. It makes a perfect scoop for the jar as well as a stainless steel coffee scoop (in background).


Make some kind of label to let family members know what's in each jar. If you don't have a labeling machine, tie something around the handle on the lid or around the mouth of the jar. Get creative!

Store extra supplies out of sight. Your jars can only hold so much and you don't want to run out. So always keep some supplies hidden away. I only have two drawers in my laundry room, so I have to make the most of them; the bottom drawer contains the extra supplies. Whenever I use one up by putting it in the jar, I immediately purchase a new one so that I never run out. You can store the extras in another room, but don't forget about them! 
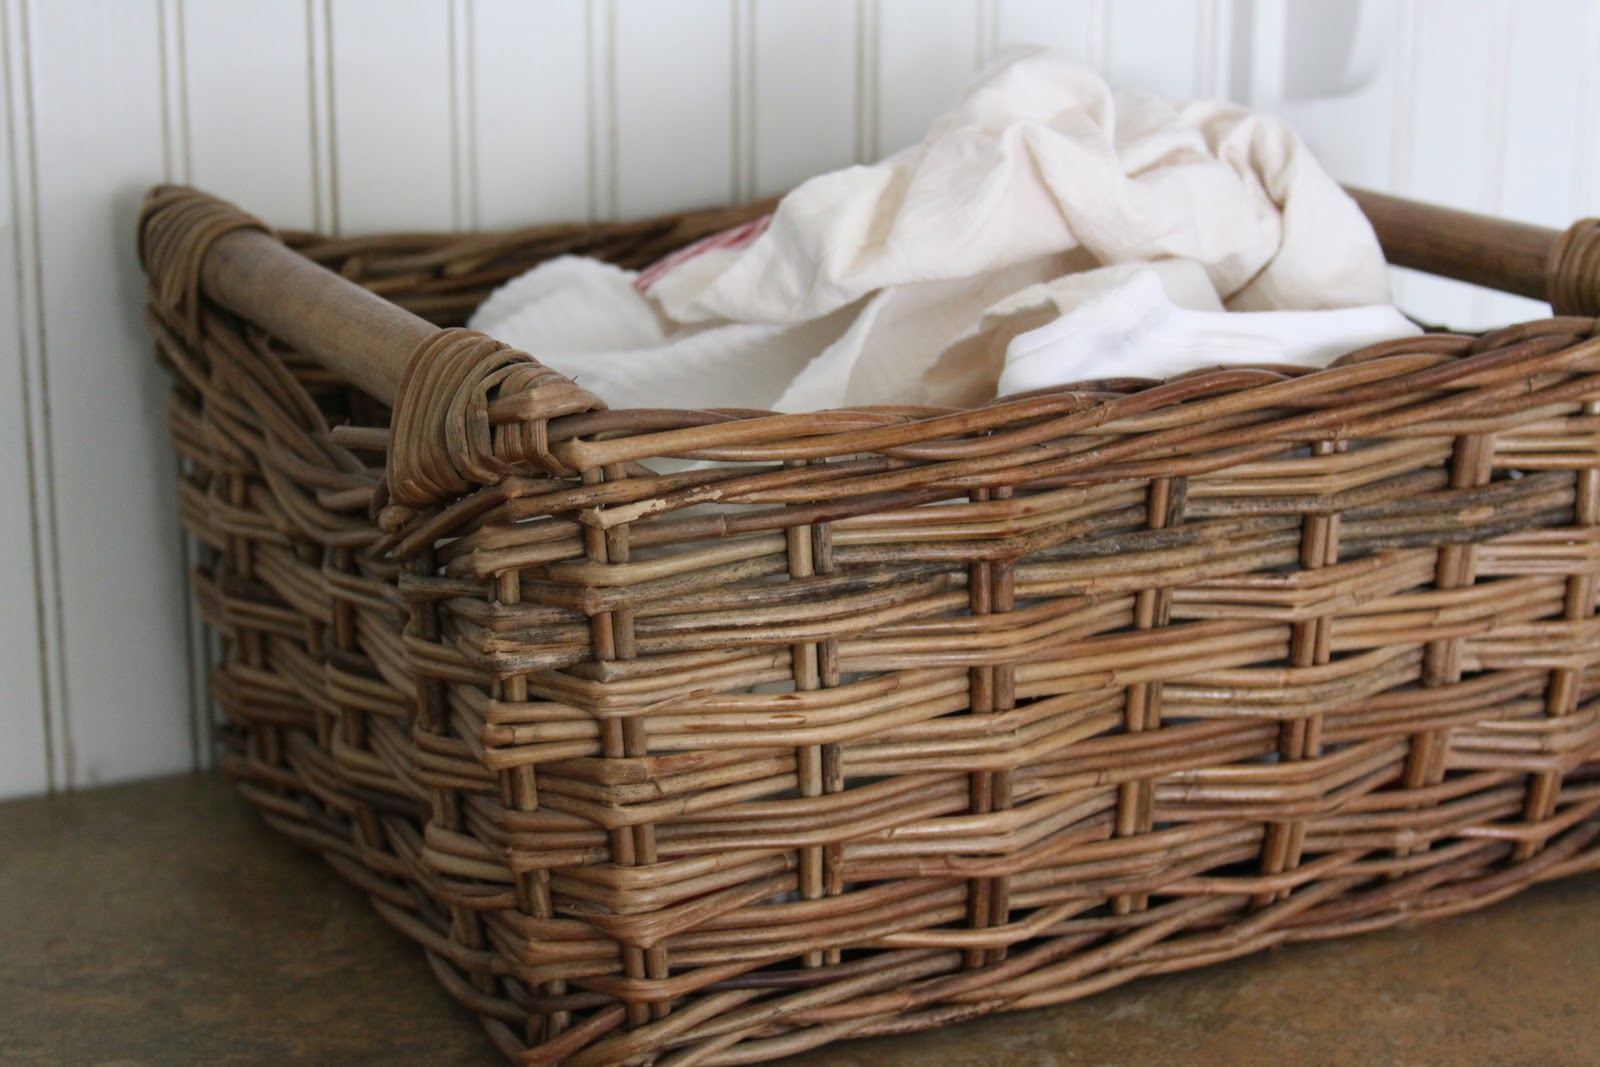

Designate a basket to receive dirty items. We keep laundry baskets in the bedroom area for dirty clothes, but I realized all those kitchen towels needed a place to go. Otherwise family members (myself included) just piled them up on top of the washer. In no time, my area was a mess and certainly not inviting! An old basket allows wet towels to air dry while keeping them contained. Attractive and practical.


Have a plan for clothes after they are folded. If you don't have a plan, they'll sit there for days and start to pile up, fall over, get dirty, and socks will vanish (if they didn't already vanish in the washer!). 


For smaller families or those who wash one person's clothes each day, a laundry basket on wheels is a lovely choice. And if you dry outside on a line, this might work for you in the summer as well.


For larger families or those who have only one or two designated laundry days, try cubbies or a stacking rack of some kind. I recommend cubbies with baskets so they can pull it out and take it to their room. You might have to buy the baskets and build a unit to fit your needs, but if that isn't an option, try using a bench with cubbies. Duel use is always good!


Select a container to collect lint. My top drawer holds three plastic containers, one of which is designated as lint and paper trash that can be composted. If you don't want to compost it, use the lint for fire starters: place some lint in each section of a cardboard egg carton, pour left over wax from candles over the lint, let set, then cut apart. Just light the cardboard and voila!


Keep needed extra supplies. Other laundry items you need to keep on hand should be contained and ready-at-hand: bleach pens, stain remover and stain remover pen, hydrogen peroxide, baking soda, and small toothbrush for stain removal, fabric labeling pens, fray check to stop ravels, and scissors. I use wool dryer balls which remain in the dryer, but you may wish to keep some dryer sheets as well. Keep it simple and don't buy stuff you really don't need! 


Add the little extras sparingly. If your laundry room is dual purpose (and most are) you may need to add back in a few (just a few!) items to make it function for your family. Our laundry room is the access to both the garage and the back porch. So we keep some dog treats on hand...


spare keys...


a color coded weekly calendar so the family can see it on the way out the door (not monthly, it's too much and overwhelming)...


A large old school blackboard for messages and reminders, scriptures and love notes...


and a splash of color. Things that make my heart sing...


Is it time for you to get after it and clean out that laundry room? Light a nice candle, get a cup of hot tea, and just go for it! Tell me you don't enjoy laundry more after it's organized and I'll eat my hat! (Just kidding!) 

Add your tips and thoughts for organizing. What makes your heart sing when you do laundry?

Monday, January 24, 2011

Choosing A Garden Tiller

I'm trying to get ready for my spring garden and one item that is on the top of my wish list is some type of cultivator or tiller. As the garden has expanded, I usually break up the soil with a larger gas powered rotary tiller that I borrow from a friend, but I don't always plant the same day and so often need to go back with something smaller to get rows ready for planting. Later in the season, I need to loosen just a bit of the soil between rows or plantings in order to reseed for staggered crops or to add in a new items as the weather changes and the soil warms up. I don't want to disturb layers of dirt, just enough to break up the ground. 


And I need help from fellow homesteaders that garden...


Photo Credit: bent6543


The question is... what kind of tiller should I purchase?


Most people immediately opt for a gas-powered tiller. My friend who has a small organic farm uses the Honda FG110. While she's a bit more petite than I am, she's still able to maneuver it without help from her husband - something that is a must for me. It does almost all the work which is the major benefit, but on the negative side, it uses gas, is subject to breaking down, will bounce on hard ground, has a limited life, and it might not work in really tight spaces. So that's one option.


Lehman's, who has served the Amish for years with their non-electric catalog of items, has a Rotary Cultivator that's received great reviews (one reviewer even commented that it's as easy to push as a grocery cart if properly set). And since the Amish are famous for their gardens as well as their quality tools, I'd say it might be a serious option. Besides being well built, this cultivator will hoe, lightly aerate, and till. At 11" wide, it will work in all but the tightest spots and since I would have more control over it, I think it might work for my some of needs. But, it won't furrow or hill; that's the negative for this option.  I'd would certainly like to hear from anyone who has used this!


Next, there is the Valley Oak or Glaser Wheel Hoe, both modeled after the original Planet Jr. Wheel Hoe. One is swiss made, the other American, but both are similar. These do not have a motor either and require human muscle power, but in their favor is the fact that each has options for different attachments for furrowing, cultivating, and hoeing. The Glaser also has a seeder that can be attached - all for a price! And one hefty price at that! I'm amazed that a non-motorized too can run $300-400 without the additional attachments. Obviously, I would have to make this purchase over several seasons, but if I'm going to do this, I really want to know from readers that it's worth the investment. I should also mention that the Valley Oak has a steel wheel option which is nice because a tire wheel could easily go flat. Nice while it works but a pain when it won't.


After a little research, I've found a possible alternative to the Valley Oak and Glaser Wheel Hoe, The Hoss Wheel Hoe, which runs closer to $160 for a single wheel or $200 for a double wheel. I think I'm leaning toward the double wheel because it stabilizes the hoe and you can actually go right over a row of seedlings with the plants in the middle until they are about 6" high. Attachments only run around $40 making it a more affordable option. There are also handle options which you may wish to consider - the curved wheel plow type or the pistol grip (tell me your opinion on these if you have one!). Planet Whizbang has a nice essay on this subject and tells you how to build your own, but time is of the essence and even the "kit" costs about the same as the Hoss if you purchase everything you need, including handles. So that being said, I think I'd stick with the Hoss.


Apparently, Planet Jr. is now The New Planet Jr. and can be purchased from Jim and Linda Brown. I see very little difference between this product and the Hoss, so it would just be a matter of preference, price, and parts. But even these factors are so similar, it's a toss up. 


Finally, there is the "hand tools" option, like the Broadfork. Developed years ago in Europe, Eliot Coleman has utilized this tool for years in his own garden and Johnny's Select Seeds is now carrying it in their catalog. I really like that I would get a gentle workout while using the Broadfork, but it shouldn't be so difficult as to wear me out! It aerates the soil without bringing weed seeds to the surface, however, I'd still need some type of hiller or hoe to make the furrows for actually planting the seeds. I really like the Broadfork, but it too is pricy and just one of several tools that I would need. This short video demonstrates it in action and gives more of it's benefits for those interested.


So, there you have it... tools I've researched for the job to date. I'm sure there are other options out there and I'd love to hear what they are, how you are using it, and what you like or don't like about it. And, if you are using one of the options I've mentioned, tell me what you think; give me the scoop that I don't know. I need to make a purchase soon, so weigh in with your thoughts! 


Sunday, January 23, 2011

Sunday Blessing


"My sheep hear My voice, 
and I know them, and they follow Me;

Photo Credit: A Roger Davies

 and I give eternal life to them, 
and they will never perish; 
and no one will snatch them out of My hand."
~ John 10: 27-28

Sometimes it's good to be a follower! The fold is safe in His care. Listen... do you hear His voice?


Saturday, January 22, 2011

Whole Wheat Cornbread

Most cornbread recipes call for both ground corn or corm meal combined with a specified amount of regular flour, but few recipes specifically call for whole wheat flour. With the exception of a few baked goods at Christmas, we grind all our own flour; true whole wheat: germ, bran, and endosperm. Therefore, there is a need for a recipe that works for just such a flour. And I just so happen to have one that works!


Whole Wheat Cornbread


1 1/2 cups whole wheat flour, hard red or hard white will work fine
1/2 cup sucanat
1/2 cup fresh ground corn meal
1 T. baking powder, aluminum-free
1/2 tsp. sea salt
1 1/4 cups milk
2 large eggs
1/3 cup olive oil
3 T. melted butter


Preheat oven to 350 degrees. Grease a pie pan with butter or use a skillet. Mix dry ingredients in a large bowl. Beat liquid ingredients in a smaller bowl and pour into dry mix. Blend well by hand and pour into pan/skillet. Bake for 35 minutes and test with cake tester to be sure it is done in the center. Cornbread should be lightly browned.


Note: For muffins, bake 18 - 20 minutes.


If you like your cornbread less cake like, you could try reducing the amount of flour and increase the corn meal. I plan to try this soon, because my husband thinks it will taste even better, but I've liked it just as it is.


You'll find that the molasses in the sucanat along with the whole wheat makes this cornbread a bit darker. But slathered with butter and some raw honey... Mmmmmm, good! 


Have you ever made cornbread with whole wheat flour?


Friday, January 21, 2011

Give Away: Levi's Lye Soap

I'm so please to announce that Amanda of Homegrown and Beeyoutiful has recently expanded her soap making so in order to open a home based business. I love supporting cottage based industries! I typically find the products superior because of the attention to details as well as the love poured into the items, not to mention the fact that the producer has careful control over the ingredients.


The new business is called Levi's Lye Soap, named after her son, and it evolved from her need to find a product that was mild enough for his skin, specifically eczema Real lye soap is the only soap he can use that is safe and non-toxic for his sensitive skin. Since she began making this soap for him, Amanda realized the entire family enjoyed the benefits of real soap. And soon, a business was born.


Each bar is handmade at her home in Virginia with her own homegrown herbs as well as natural coconut, vegetable and olive oils, and natural spring water.


To celebrate Levi's Lye Soap's Grand Opening, Amanda is giving everyone a 10 percent discount through February 28th (U.S. residents only). Just use the code "Homestead Revival" in the space provided for the coupon code when checking out.


Give Away 


To win 4 bars of Levi's Lye Soap...


1. Visit her Etsy store and look around. Tell me which of her four scents you would like to try the most, then come back here and leave a comment with the scent name. If you do not have a blog, please leave an email address so that I can contact you if you win.


2. Blog about this give-away to help get the word out about Amanda's new business, then come back here and leave a second separate comment and you'll be entered again. Note: You must include a link on your post back to this give-away. 


The fine print...  


This give-away is only open to U.S. Residents and closes on Friday, January 28th at 11:59 p.m. Winner should please respond within 3 days of being contacted.


Thanks for participating and spreading the word, friends!


Wednesday, January 19, 2011

Salad Dressing Recipe Exchange

I've really wanted to move away from purchased, commercial salad dressings and make my own from scratch on a regular basis, but two things need to happen in order for that to take place. First, I need several great recipes that my family can make fairly quickly and easily (recipes which taste really good), and second, I need to have all the supplies on hand and organized.


Photo Credit: wintersoul1


Anke over at Our Little Piece of Heaven had a great idea for keeping all her salad dressing supplies corralled in one place and this inspired me to do the same. Instead of a lazy-susan like Anke's, I just used a basket to hold all my oils, vinegars, and such for dressings. I can simply pull it out of the pantry and then easily return the basket after making up the dressing. When I get my recipes, I plan to put them on laminated 3 x 5 cards with a ring and stick them in the side of the basket. Simple? I think so.


But now I need some recipes. Perhaps you have a really great one and you'd like a few more? Participate in this Salad Dressing Recipe Exchange and we'll all be happily making our own dressings in a jiffy. Give me your best, gals! 


For my own Pesto Salad Dressing Recipe, click HERE!

Salad Dressing Recipe Exchange:

1. Write a blog post with a favorite salad dressing recipe and if you'd like, include the salad recipe as well, if there is one.

2. Include this button on your post - for Mac's just drag it to your desktop and then upload. I need a PC person to tell us how to do it for the PC users!


3. Copy the URL of your post and come back here and add it to the Linky below along with your photo. If you don't have a recipe photo, you can include your profile photo or a photo from your header. 


I can hardly wait to see what kind of salad dressing recipes you'll post!

* This post has been linked to Raising Homemaker's "Homemaking Link-Up Day"

LinkWithin

Related Posts with Thumbnails