As promised, I'm posting a Whole Wheat Bread Recipe for making a loaf of sandwich bread that I like to use. I believe I got this from Sue Becker's Cookbook, so I want to be sure to give her credit. She has several very informative articles on her website, Bread Beckers, that you might wish to read sometime! As I go through the recipe I will be highlighting tips that will really make a difference. Be sure to read through these a couple of times before you begin. Also, I've added as many pictures as I could so that you could see what it should look like.
Whole Wheat Bread
2 C. warm water (110 - 115 degrees)
2 C. warm water (110 - 115 degrees)
1/3 C. olive oil
1/4 C. honey (I like to use raw honey)
1 egg
3 1/2 tsp. yeast
5-6 C. whole wheat flour (I like to use Prairie Gold freshly milled)
2 tsp. sea salt
Tools Needed:
mixer with dough hook
bowl or container for proofing
two loaf pans 8 1/2" x 4 1/2" x 2 1/2"
basic measuring spoons, cups, etc.
tip: bring all ingredients to room temperature so that a cold ingredient doesn't deactivate your yeast. I keep my yeast in the freezer to keep it fresh and so this is very important.
tip: grease your mixing bowl generously with olive oil as well as the dough hook. This will keep the dough from climbing the hook while you are kneading it! It may get near the top, but it shouldn't go over and into the mechanism.
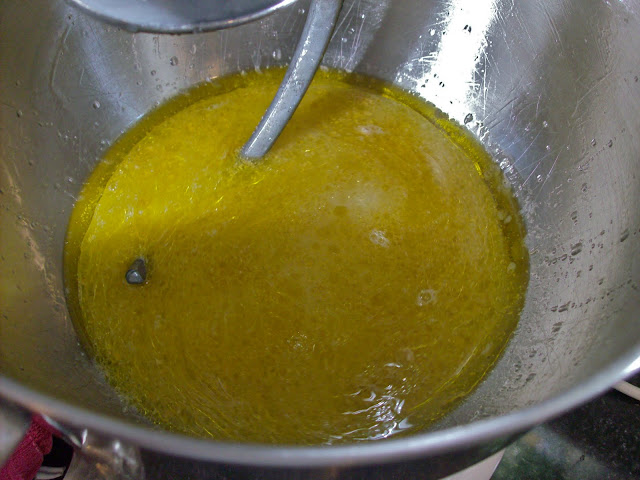
Combine water, oil, honey, and egg in mixing bowl.
Add yeast and then three cups of flour and salt.
tip: if your mixing bowl is stainless steel and the temperature in your room is causing the bowl to be very cold, either heat the bowl with warm water before beginning, or be sure that your water is right at 115 degrees because the cold bowl can bring down the temperature.
tip: measure your oil first and then honey using the same measuring cup. This will help the honey come out easily and completely.
tip: always add the salt with the flour so as not to kill the yeast. I usually add it to the third cup of flour.
Continue adding two more cups of flour. On the sixth cup, add only as needed. Starting timing your kneading process with a timer for 10 minutes. Watch the dough as it kneads and add just a bit more flour here and there as you see it getting too sticky and leaving too much on the sides of the bowl.


tip: several factors will determine how much flour you must add at this point. Try not to add any more than necessary as it will make your bread heavy. It should be a bit sticky, but not so sticky as to leave dough on your hands when you touch it. Eventually, the bowl sides should be fairly clean by the kneading process.
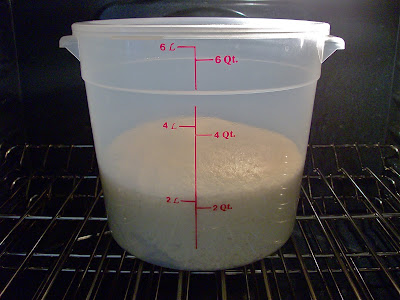
Transfer dough to a well greased container for proofing (rising). Roll the dough over to coat it with oil. Cover and place in a warm location. Proof until doubled in size.
Transfer dough to a well greased container for proofing (rising). Roll the dough over to coat it with oil. Cover and place in a warm location. Proof until doubled in size.
tip: I like to use a food grade commercial tub with a matching lid. These come in various sizes with quart and liter markings on the side. You can purchase these through King Arthur Flour or at Smart 'N Final or at a restaurant supply store.
Note: my oven has a special proofing feature on it that sets the temperature at just the right amount for rising bread. Most ovens do NOT have this feature and do not attempt to use your oven for this if you don't have this setting unless your oven is gas and you use ONLY the pilot light. If you get your oven too hot, it will kill your yeast. Some options for warm locations include, above a refrigerator, dryer, or in an Excalibur dehydrator. If none of these work for you, I use to put a cooling rack over my sink that was filled with very hot water. I placed the dough in a shallow bowl on the cooling rack and covered the entire sink with a large light weight kitchen towel. This worked just fine before I was blessed with this new oven.
Note: my oven has a special proofing feature on it that sets the temperature at just the right amount for rising bread. Most ovens do NOT have this feature and do not attempt to use your oven for this if you don't have this setting unless your oven is gas and you use ONLY the pilot light. If you get your oven too hot, it will kill your yeast. Some options for warm locations include, above a refrigerator, dryer, or in an Excalibur dehydrator. If none of these work for you, I use to put a cooling rack over my sink that was filled with very hot water. I placed the dough in a shallow bowl on the cooling rack and covered the entire sink with a large light weight kitchen towel. This worked just fine before I was blessed with this new oven.
After the bread has doubled in size, turn out, punch down, and shape into two loaves.
tip: cut the dough into two loaves that are close to the same size as possible. Don't worry about a lot of kneading at this point, but you need to get the air pockets out. I like to roll the bread out into a rectangle and then start on the narrow end and roll tightly keeping it from growing longer than my loaf pan.


Place into loaf pans and brush with melted butter.
Proof again, letting the loaves rise to just above the top of the loaf pan. Bake in a preheated oven at 350 degrees for 30 minutes. Cool 10 minutes and then turn out of the pans.
tip: don't allow bread to rise too high or it will start to collapse over the sides of your loaf pan and become difficult to remove.
tip: bread will be done when you tap on it and it sounds hollow.
tip: To remove bread from pan, slip a flat edge tool around the sides to loosen. When you turn out the bread, lay it on a cooling rack on its side to prevent it from collapsing while it is hot.


tip:
resist all temptation to slice hot bread! It will cause it to be gummy! Allow it to cool completely before slicing. (Unless you like gummy bread of course and you're not using it for sandwiches or toast.)

I hope you will find all these tips helpful. I can't think of anything more frustrating than spending all that time making bread only to have it come out so-so or poorly. I know, because it's happened to me. And sometimes, for strange and unknown reasons, a loaf will have a "bad day" and just won't be what I expected. But over time, my breads have come out consistently nice and with just the texture I need for making sandwiches. If you still have a problem, check out the Baking911 troubleshooting page. It is very informative and should help you determine what went wrong.
In the future, I will be posting additional articles that contain more information for making homemade breads. I hope to explore sour doughs, artisan breads, and more! After all, bread is the staff of life, right?


